Dates are laid out in TimeStory from left to right, and you can freely scroll around, jump to specific dates, and adjust the scale (how much of the timeline appears on screen) in multiple ways. Whether for a brief timeline measured in days or a large one spanning millennia, there are a variety of ways to get around quickly and intuitively.
Scrolling
You can freely scroll left or right, even beyond any events you’ve already placed, to view or edit different regions of time.
Scrolling left or right uses standard gestures:
- Use standard two-finger horizontal scrolling gestures on a trackpad.
- When using a mouse with a scroll wheel, hold Shift while moving the wheel to scroll left/right instead of up/down.
- With nothing selected, press the arrow keys to scroll by increments. Note that, if an event or other item is selected and editable, the arrow keys will move that item if possible instead.
- By default, there’s also a scroll control at the bottom of the window, providing buttons to scroll shorter or longer distances. This can be hidden if unwanted. See The Floating Controls (at the bottom) for details.
Panning (the Hand Tool)
Press and hold the space bar to activate panning—the pointer will change into a hand, and you can click and drag the document around to scroll precisely. Release the space bar to stop panning.
Adjusting the Time Scale
Time is laid out in units of year, quarter, month, week, or day. The time scale determines how wide each such unit is on screen, and thus how many units are visible at a time. Fast, simple adjustment of time scale is one of TimeStory’s key features.
(See Timeline Configuration and Time Scale for a deep dive into time units, timeline configuration, and how time scaling works.)
By default, there’s a time scale legend and control floating at the bottom of a timeline view. (You can show or hide this control; see The Floating Controls (at the bottom) for details. Similar to the concept of the distance scale bar on a map, the scale bar shows the linear scale of the actual time span in the current view. Drag right or left along the scale bar to adjust the time scale.
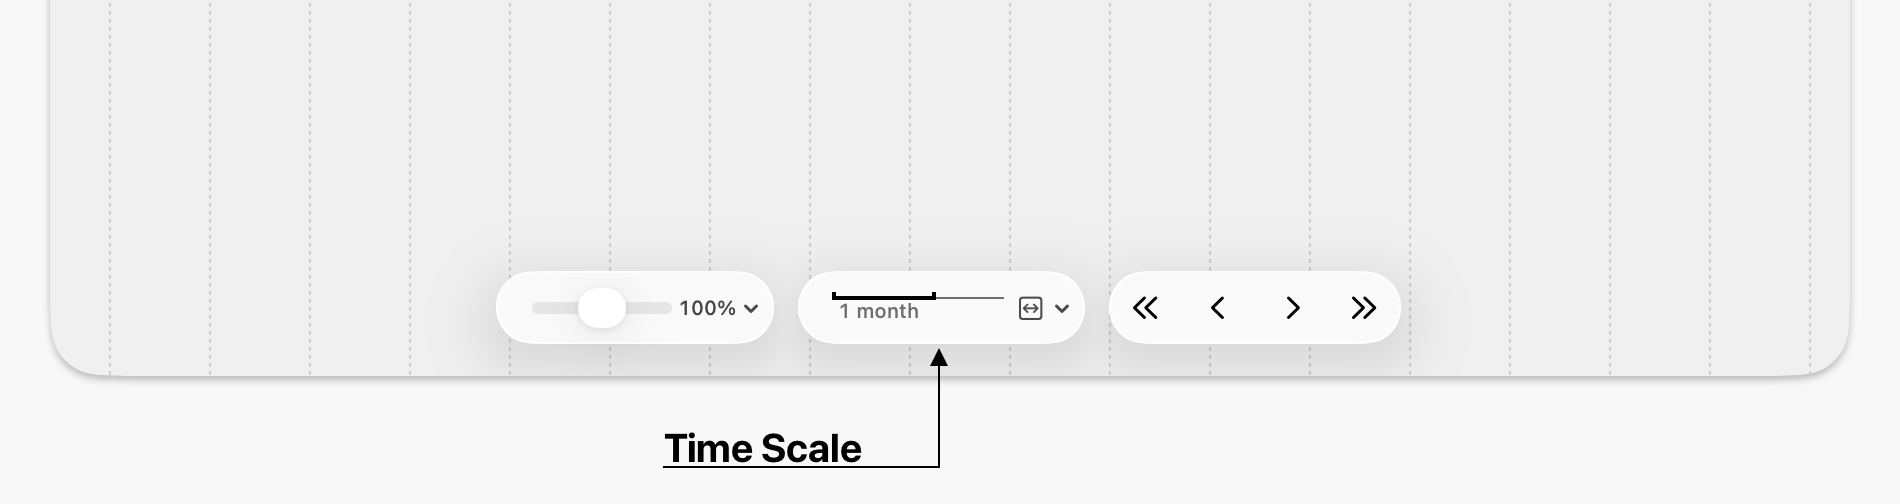
You can also adjust the time scale directly a few different ways:
- On a trackpad, use a two-finger pinch gesture
- With a mouse, hold the Command key and turn the scroll wheel
- On a keyboard, press Command+up or Command+down.
The View→Time Scale menu also provides quick actions, with keyboard shortcuts, for time scale adjustments:
- To scale up or down, use or
- Use to try and set the current scale to exactly fit all events in the timeline in your current window. Depending on your configuration, note that this may not be possible; for example, if your timeline configuration uses “days” units, a hundred-year timeline can’t be scaled down far enough as each day can’t get small enough.
- Use to choose a time scale which makes the smallest unit in your current timeline configuration a comfortable, default width.
- Use to choose a time scale based on your current timeline header configuration. The scale chosen will be the smallest one which avoids skipping, abbreviating, or hiding labels; see the next section for details.
Zooming In or Out
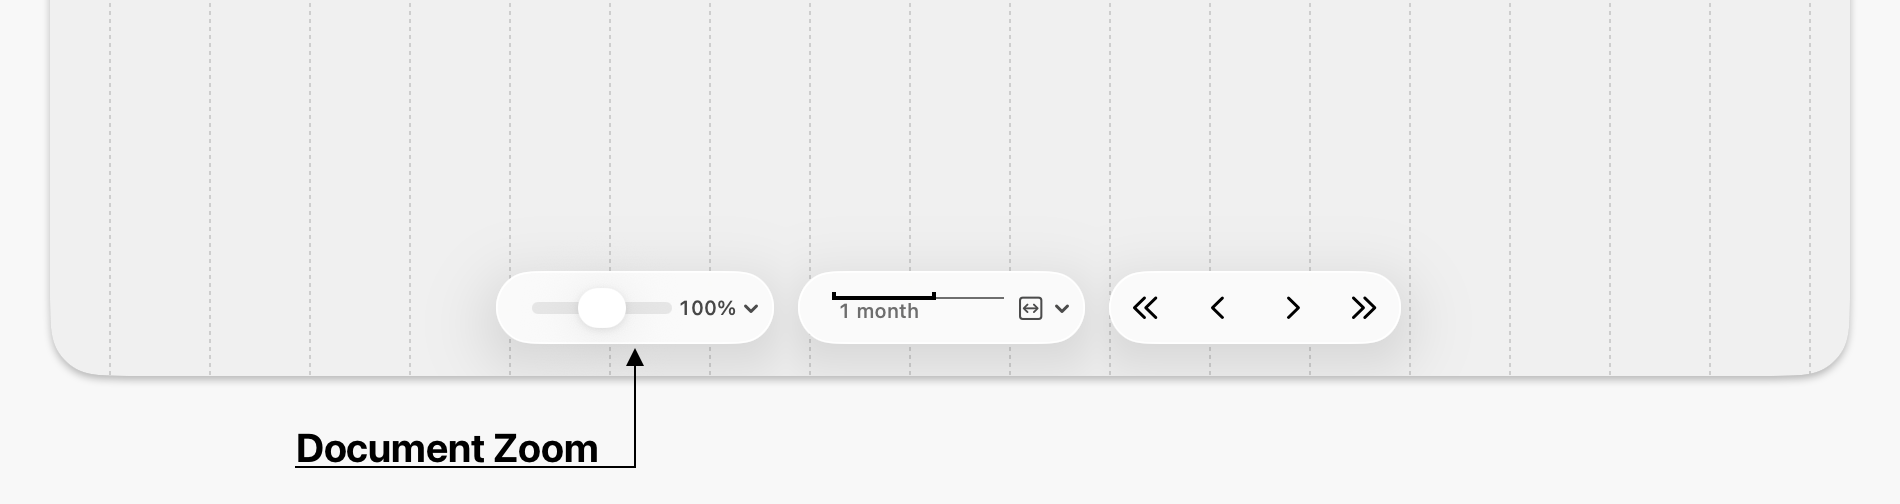
You can also zoom in or out, magnifying or shrinking the entire timeline. This makes text, images, headers, and everything else larger or smaller, for legibility.
Drag the Document Zoom slider (at the bottom of the window) right or left to zoom in or out of the timeline document.
Floating Controls
By default, there are three floating controls at the bottom of any timeline window: Document Zoom, Time Scale, and Time Scroller. They default to visible, but you can show or hide them at any time with View→Floating Controls.
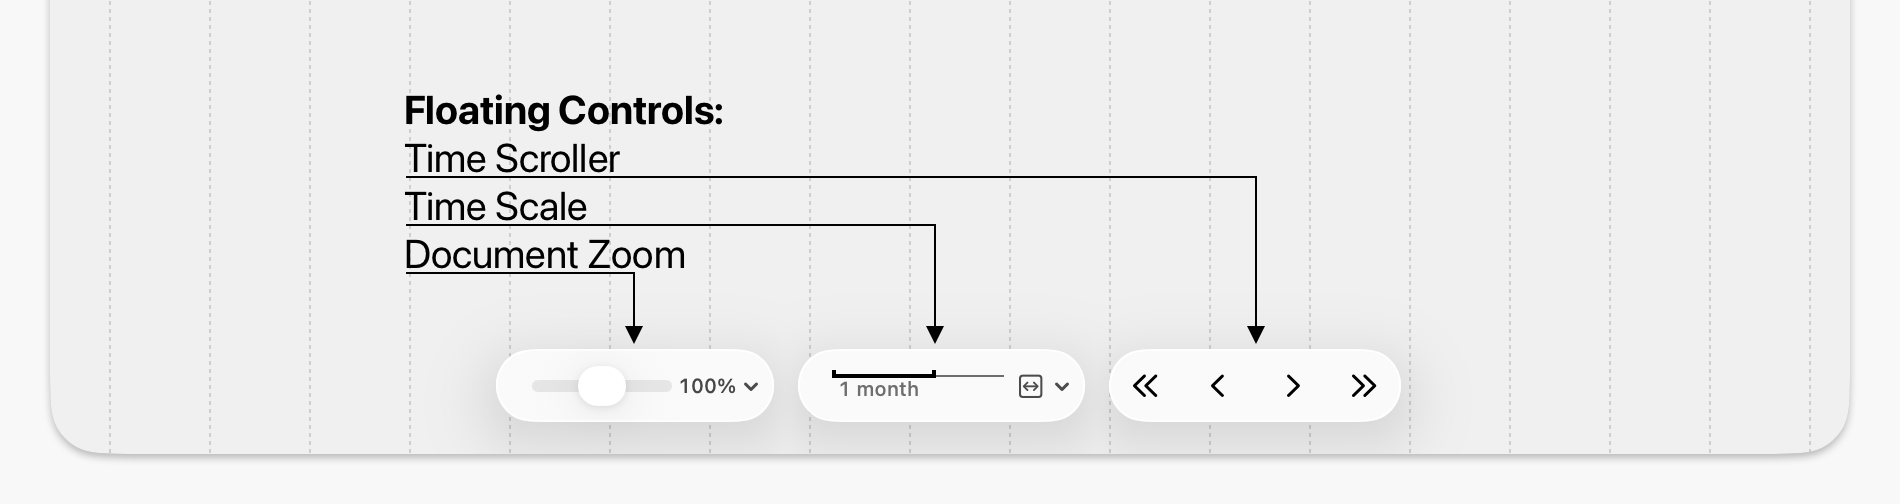
As noted above, these provide direct control of document zoom, time scale, and scrolling.
Jumping to a Specific Date
To quickly move to a date, choose (or press the G key). This prompts you to type in a date; you can enter a specific date, a year number, or just a year and month, and the timeline will scroll horizontally to this location.
Jumping to Today’s Date
Using the Highlight Today feature, you can quickly locate today’s date. When you show or hide the highlight, using the Today button on the toolbar or , the document will scroll it into view if it’s off screen.
The Dateline
Use the Dateline to see exactly what date your pointer is over, or to help point out a date while presenting a timeline. Turn it on or off with , with its toolbar button  , or with the Control+D keyboard shortcut.
When on, the Dateline appears as a vertical line that tracks your pointer, plus a tooltip-style display of the closest date. When the line gets close to a span event’s start or end date, or to a point event’s date, it snaps to that date, so even on a dense timeline, you can easily find and highlight exact event dates. (Hold the Command key down while using the Dateline to avoid this snapping behavior.)
Showing Event Details
You can quickly access details like title, description, date range, and tags for any event, section, or image in the details view popover. This is useful when browsing or editing a large timeline, and lets you see everything while keeping the Inspector closed. Select an event and type the ? key, or use .
Or, in the TimeStory Settings window, you can turn on a feature where the details popover appears whenever your pointer pauses over an event, similar to how tooltips work.
Using Bookmarks
To make it faster to jump around large timelines, you can bookmark any event for quick access. Use to set or clear a bookmark on the selected event, or use that event’s context menu.
Bookmarked events show up in the Bookmarks menu. Selecting a bookmark selects that event and scrolls the timeline to make it visible. In some cases, it might even make sense to create point events purely to serve as bookmarks, to jump to known dates where an event doesn’t already exist.
(Note that if a bookmarked event is hidden, because its section is collapsed or hidden or because it’s been filtered out, that bookmark can’t be used, and will be inactive in the menu.)