A TimeStory document consists of events assigned to dates on a horizontal timeline, with the past to the left and the future to the right. Unlike in many other apps, the blank “canvas” you see when creating a new timeline document doesn’t require you to set a date range first. You can just pick a date and start working (e.g. to create or update events).
Creating Your First Timeline
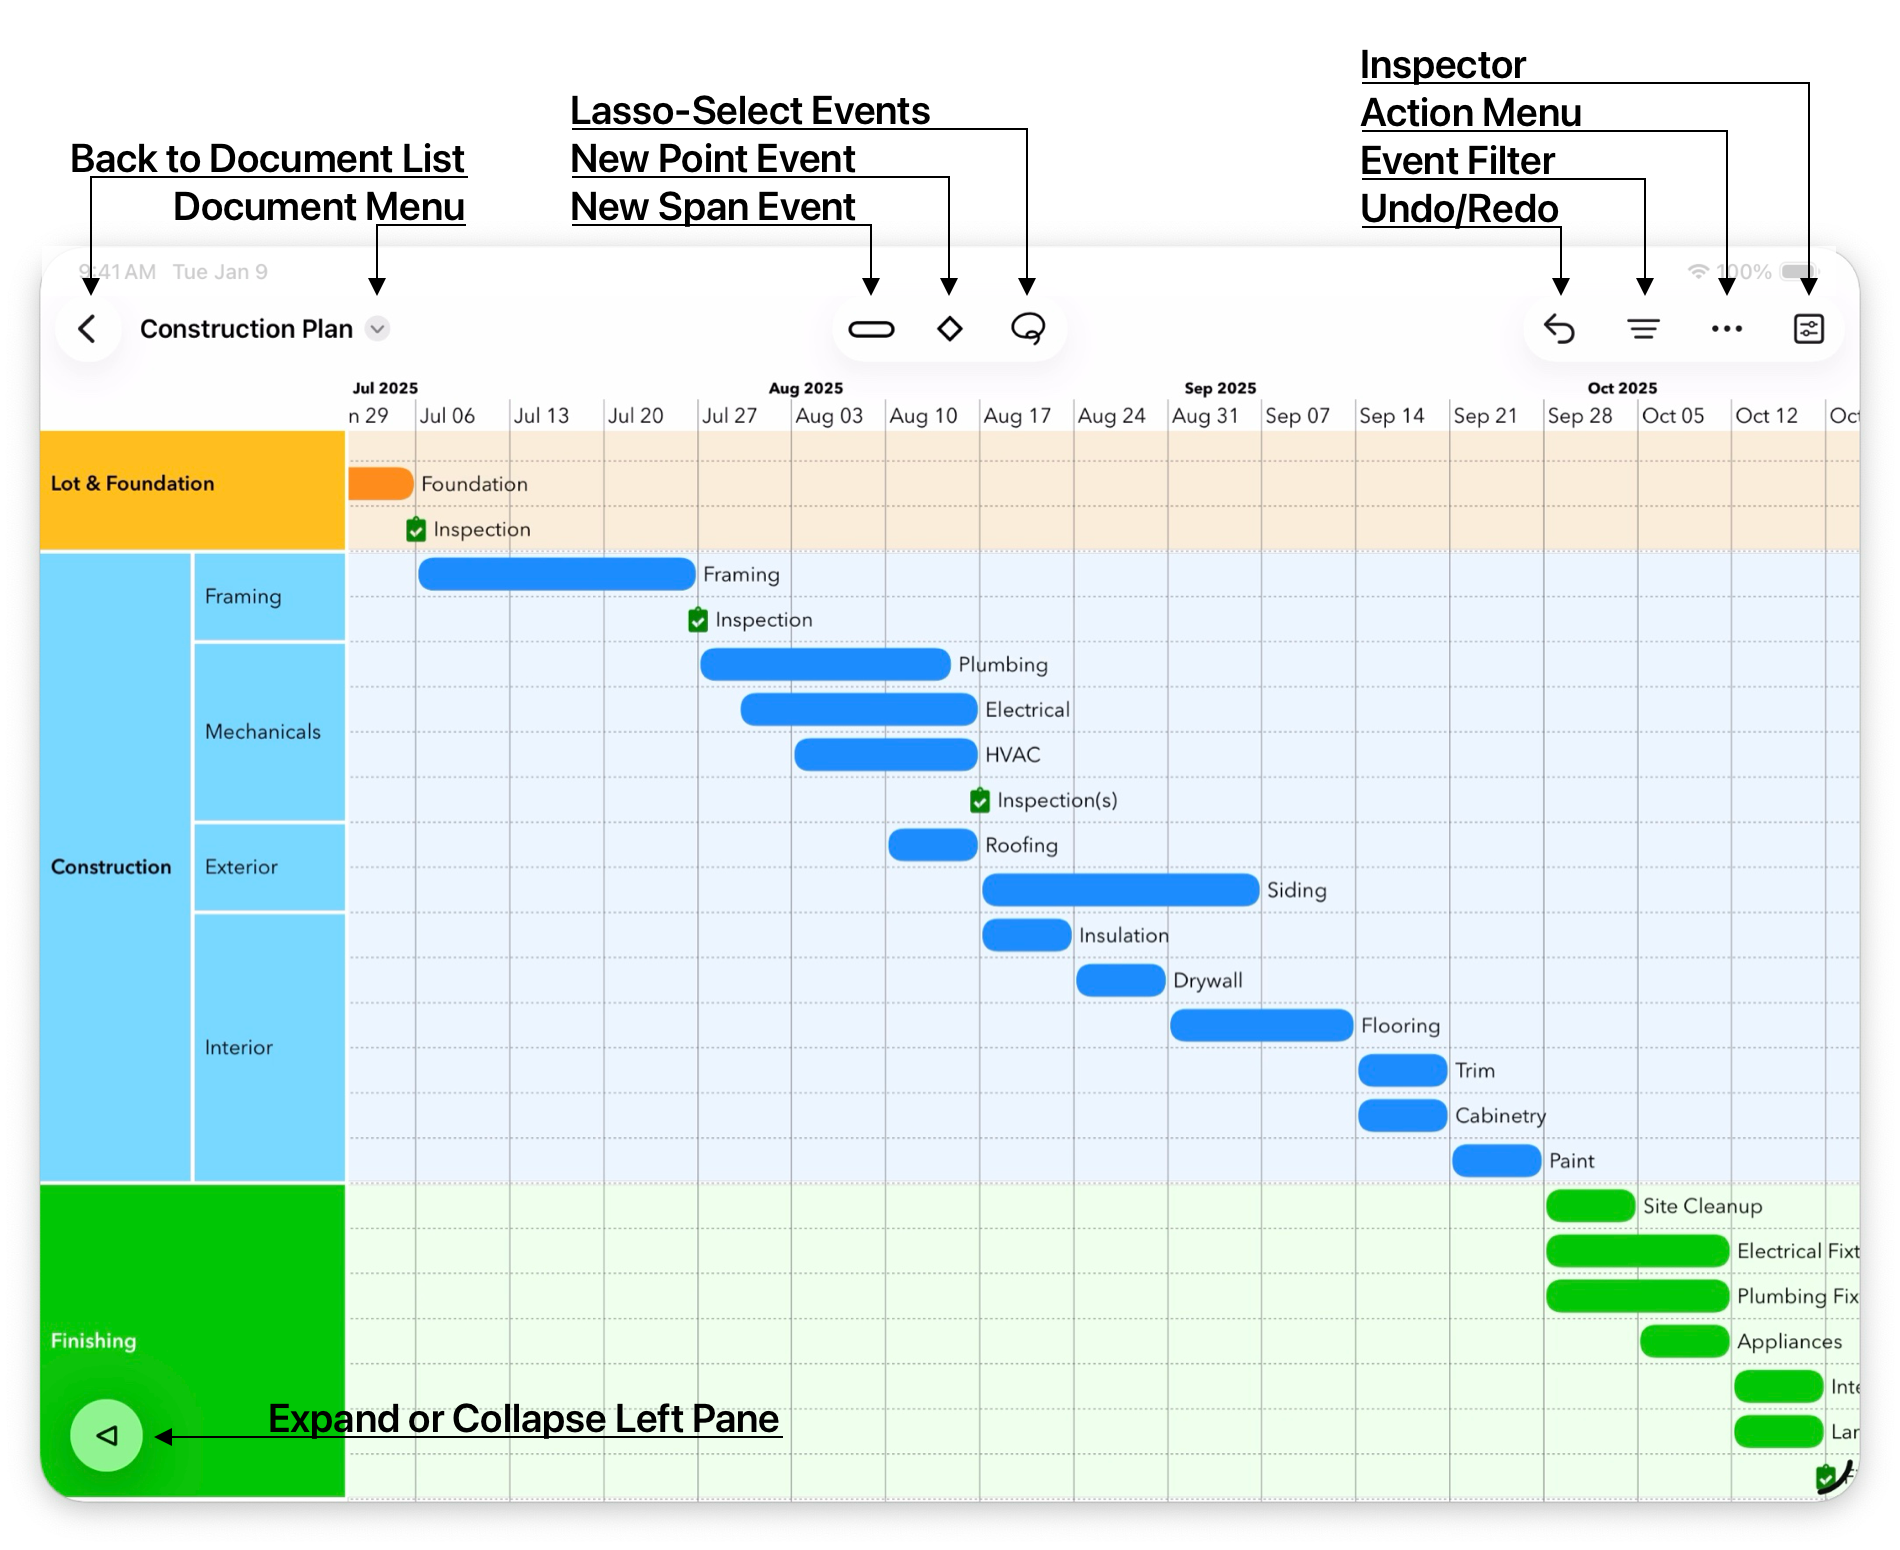
In the initial file picker window, tap the + button in the upper right toolbar area to choose a template and create a new timeline.
You can add any number of events to a timeline. There are two types of events:
- Span events, representing timespans, tasks, durations, or anything with a start and end date
- Point events, representing milestones, calendar dates, or anything represented by a single date without duration
Tap the New Span Event  or New Point Event
  button in the toolbar, then tap anywhere on the timeline to place your new event. For span events, you can also place your finger and drag to mark its entire range from start to end.
Once an event has been placed, you can grab it and drag it around with your finger. You can also drag a span event’s start or end date independently. Double-tap an event to start editing its title in place.
TimeStory provides many features for manipulating, editing, or styling events, as well as designing timeline headers. There are also other options to enter events, including Quick Event Entry for typing them in, or Importing from CSV to bring them in from external sources.
Main Controls
The Toolbar (at the top)
Note that when the app screen width is really narrow or compact, e.g. on the iPhone or in a split screen with other apps on the iPad, all specific control toolbar buttons may collapse into the  button.
- New Point Event: Tap on the timeline canvas to place a point event (with a single date).
- New Span Event: Drag across the timeline to draw a span event (with start and end dates).

- Lasso Select events: The Lasso Select mode lets you select one or more events by drawing a free-form border line around those events, or by tapping one event at a time to select/deselect it.

- Copy Style: When you have an item selected, activate this tool, then tap on any other item to replicate its colors, fonts, and other applicable styling.

- Undo/Redo: When edits have been made, you can tap this to undo the most recent one. Press and hold to show a menu with Undo and Redo choices detailing what each undo or redo (if available) is.

- Show/Hide the Events Filter.
- More menu actions, such as switching between view and edit modes, quick entry form, jump to a date, etc.

- Show/Hide the Inspector.
The Floating Controls (at the bottom)

- Collapse/Expand the Left Pane (i.e. section headers, if existing).

- Show/Hide the Nudge Tool. When one or more events are selected, this Nudge Tool floating control will appear at the lower right bottom of the window. When toggled on, you can use the nudge buttons to push the selected event(s) one day or one row at a time, when dragging isn’t precise enough.
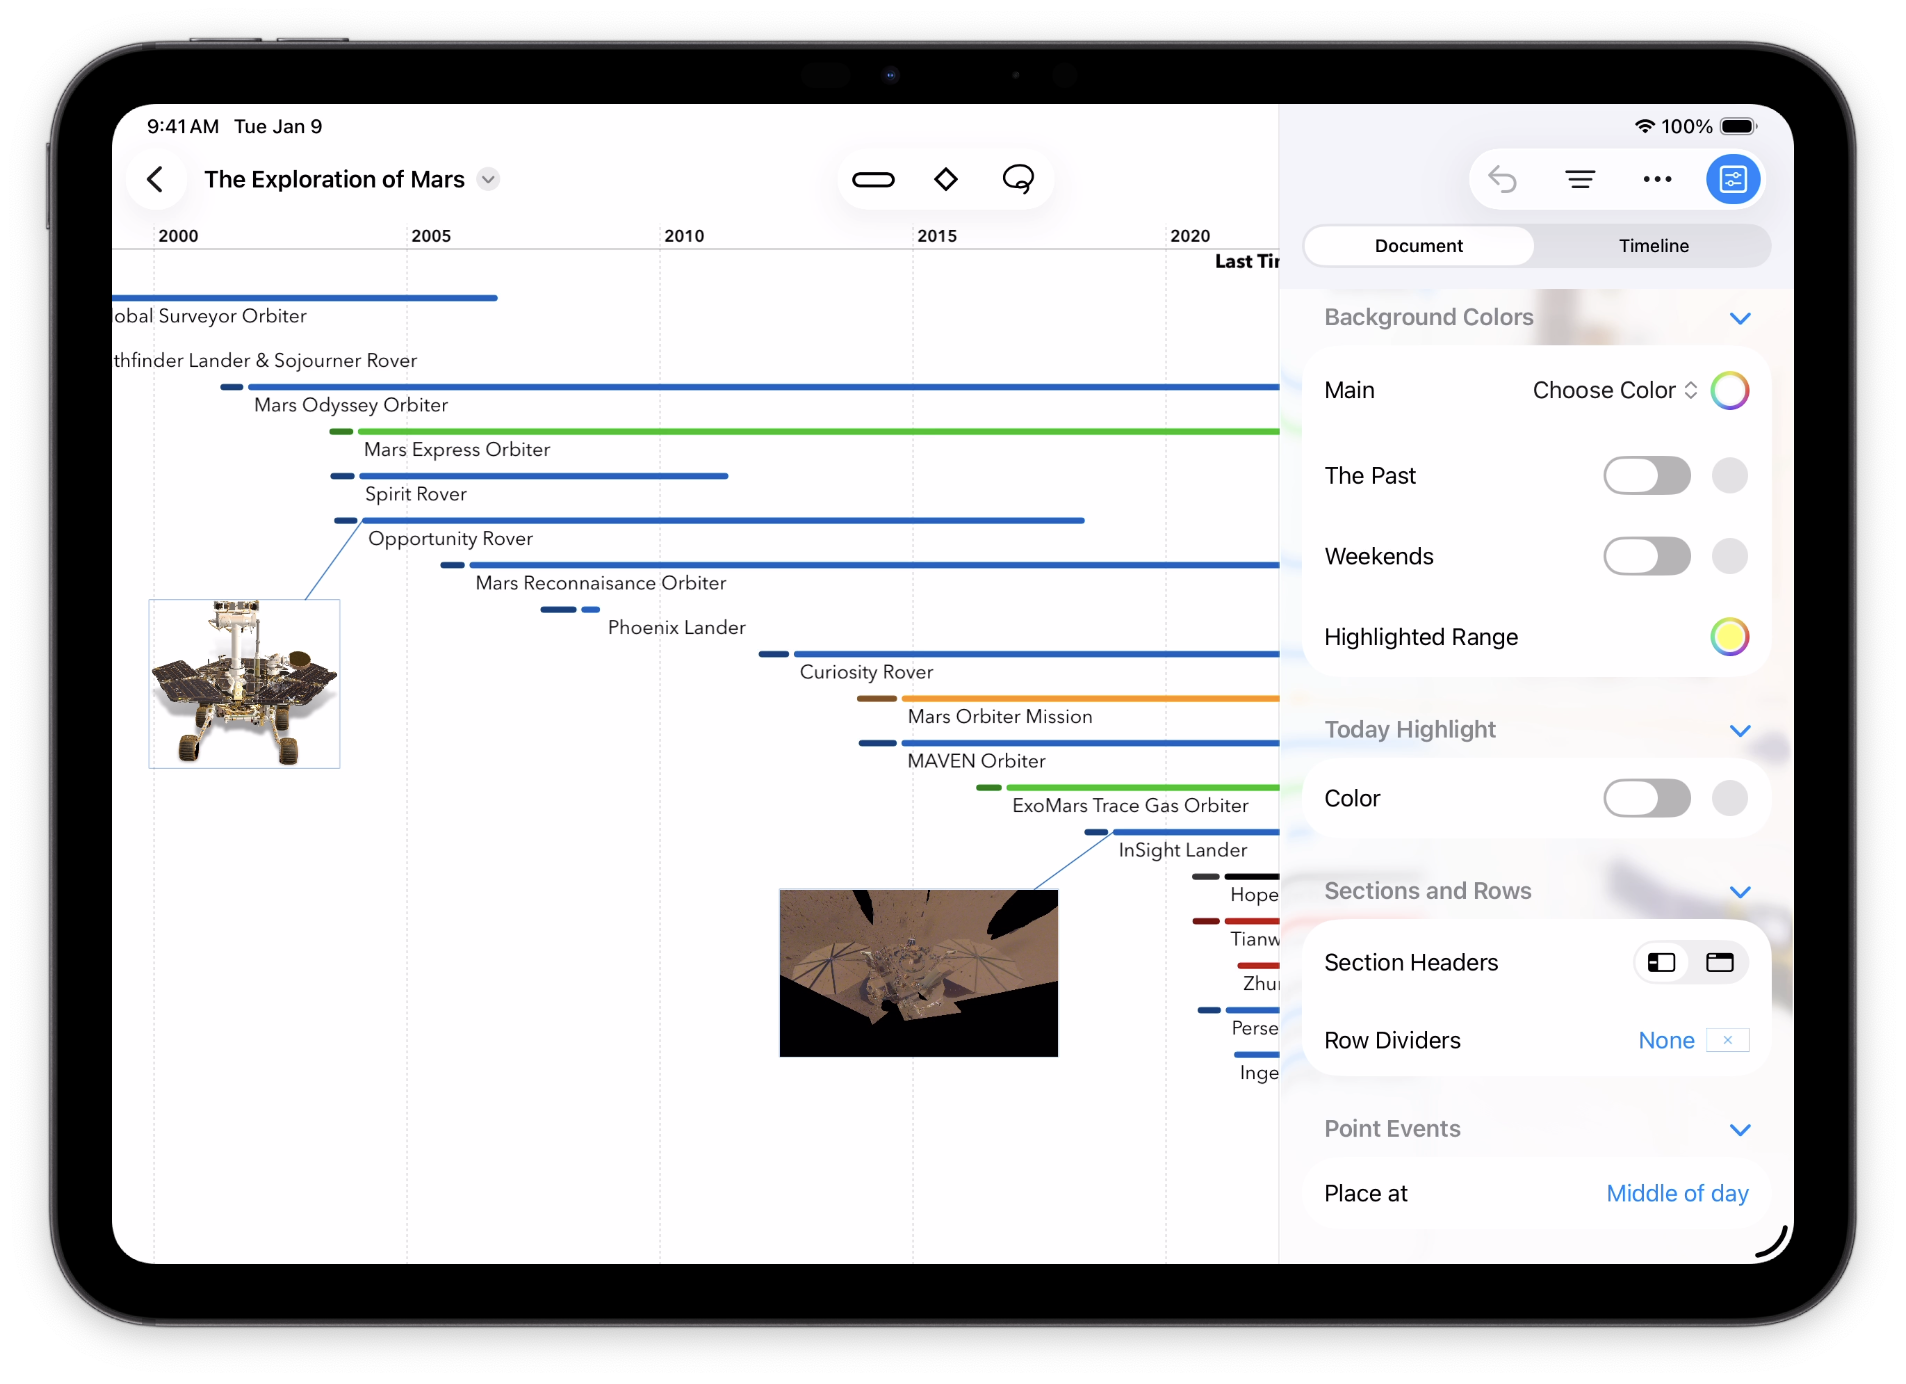
The Inspector
The Inspector is the central place to view and change the configuration and style of your timeline. If you have events, sections, or images selected, it shows their properties, and if you have nothing selected, it shows general properties of the timeline itself.